
Best Discounts
The best discounts this week
Every week you can find the best discounts here.


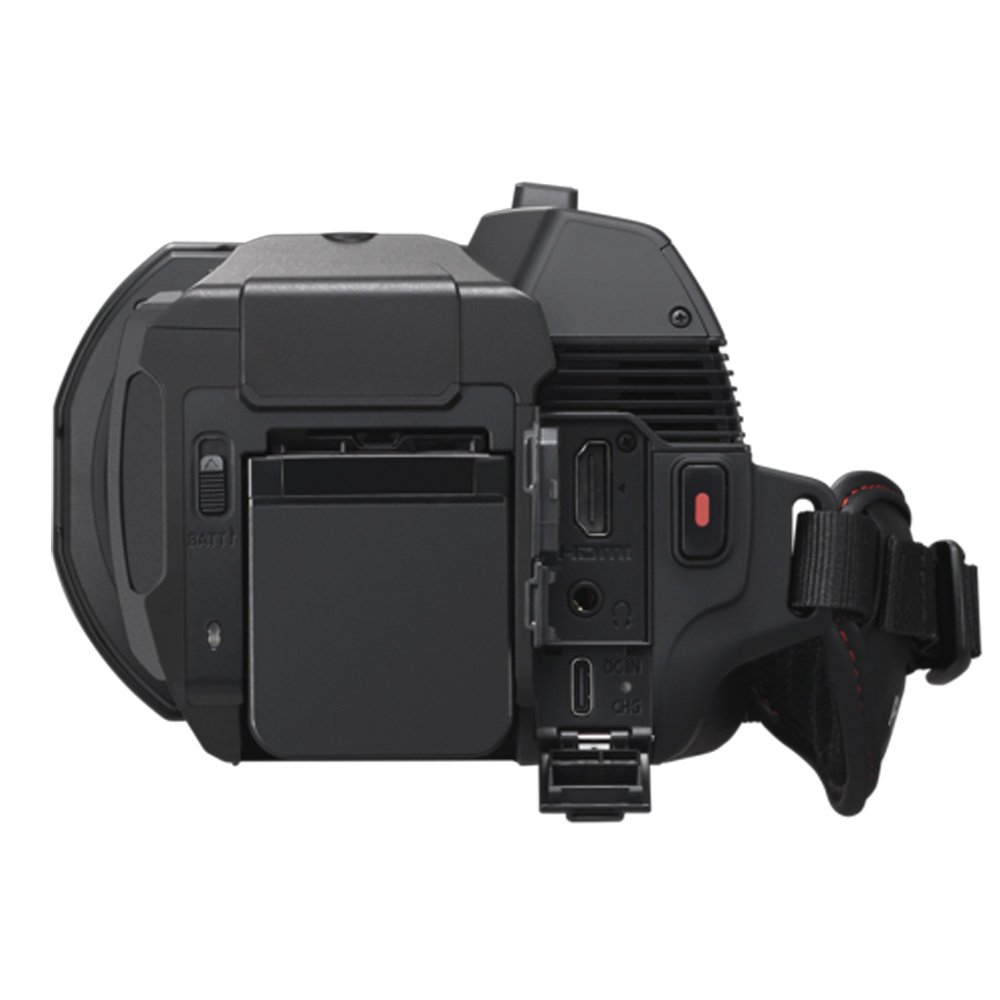
Panasonic HC-X1200E Camera
€1,299.00
In Stock
- 4K UHD recording at 60p for stunning video quality
- 20x optical zoom lens for versatile shooting options
- Hybrid O.I.S.+ (5-axis image stabilization) for steady footage
- Dual-camera operation with integrated secondary image sensor
- 3G-SDI output for seamless professional workflow integration
- 3.5-inch LCD touchscreen for intuitive controls and live monitoring
- Dual SD card slots for simultaneous or continuous recording
- Built-in ND filter for optimal light adjustment and various recording formats supported (MP4, MOV, AVCHD)
In Stock
- Delivered today (order Mon-Fri before 12:00, delivery between 17:00 and 22:00)
- Including shipping costs, sent by buymefy.com
- Pick up at a buymefy.com collection point is possible
- 30 days to change your mind and free returns
- Day and night customer service
Description
How to Use the Panasonic HC-X1200E Camcorder
Getting Started
- Unbox the camcorder and ensure you have all components: camcorder, battery, power adapter, HDMI cable, lens cap, microphone holder, and manual.
- Charge the battery using the power adapter before your first use.
- Attach the battery to the camcorder by sliding it into the battery slot until it clicks into place.
Setting Up the Camcorder
- Extend the LCD touchscreen by gently pulling it away from the body of the camcorder.
- Turn on the camcorder by pressing the power button.
- Select the video recording mode by navigating through the menu using the touchscreen.
- Choose your desired video resolution (4K or Full HD) and frame rate (60p, 50p, etc.) in the menu settings.
Adjusting the Zoom and Focus
- Use the zoom lever to adjust the 20x optical zoom for close-up shots or wide-angle views.
- Utilize the manual focus option if you want to have more control over the focus settings. Adjust it using the focus ring on the lens.
Stabilizing Your Shots
- Activate Hybrid O.I.S.+ for improved stability during handheld shooting.
- For best results, hold the camcorder with both hands and brace your elbows against your body.
Recording Video
- Press the record button to start capturing video.
- Monitor your recording using the high-resolution OLED viewfinder or the LCD touchscreen.
- Use the built-in ND filter to adjust exposure in bright conditions.
Audio Recording
- Connect an external microphone to the XLR inputs for higher quality audio.
- Check audio levels and adjust the gain settings as necessary through the menu.
Saving and Transferring Footage
- Insert SD cards into the dual card slots for simultaneous or relay recording.
- After recording, transfer your footage to a computer using the USB port or by removing the SD card.
Wireless Streaming and Control
- Connect to Wi-Fi to enable wireless streaming or remote control features.
- Follow the on-screen instructions to set up the Wi-Fi connection.
Powering Off and Maintenance
- Turn off the camcorder by pressing the power button again.
- Remove the battery if you won’t be using the camcorder for an extended period.
- Store the camcorder in a dry, cool place and clean the lens regularly with a microfiber cloth.
Consulting the Manual
- Refer to the included manual for detailed information on advanced features and troubleshooting tips.
Related products


Recently viewed items


Reviews
There are no reviews yet.